Masterful Techniques for Capturing Jaw-Dropping Bird Photos in the Wild
Contents

Essential Gear: From Budget to Pro
You’ve got the binoculars, the patience, and the early morning alarm set. But when that kingfisher finally poses, your camera delivers a blurry mess. Sound familiar? Most bird photography frustration isn’t talent — it’s gear mismatches and missed settings. This guide fixes those specific failures, from choosing the right lens to rescuing shots in terrible light.
For Canon shooters starting out, the Canon EF 75-300mm f/4-5.6 III Telephoto Zoom Lens (Renewed) is a budget-friendly entry point. It gives you a 75-300mm reach without breaking the bank, and the renewed version works like new for a fraction of the cost. Pair it with a crop-sensor body and you’re effectively at 450mm — enough for many perching birds and some flight shots.

Canon
Canon EF 75-300mm f/4-5.6 III Telephoto Zoom…
- EF Mount; Aperture Range: f/4-45; DC Autofocus Motor; 4.9' Minimum Focus Distance; 58mm Filter Thread Diameter
- 4.9-foot closest focusing distance; 32- to 8-degree diagonal angle of view
- Measures 2.8 inches in diameter and 4.8 inches long; weighs 16.8 ounces
The Non-Negotiable Telephoto Lens
You can’t get close to a wild bird without scaring it. That’s why a telephoto lens is the backbone of this hobby. You need at least 300mm on a crop sensor, or 400mm+ on full frame, to fill the frame with a sparrow-sized subject. The 75-300mm is a fine starter, but its f/5.6 maximum aperture at the long end struggles in low light. You’ll compensate with higher ISO or faster shutter speeds, which we’ll cover shortly.
If your budget allows, look for a 150-600mm zoom or a 400mm prime. The extra reach matters more than sharpness in many cases — a slightly soft image of a rare bird beats a tack-sharp image of an empty branch. But don’t ignore weight. A 6-pound lens on a hike is misery. The 75-300mm weighs just over a pound, which makes it a practical walk-around choice.
Smartphone & Hybrid Setups
You don’t own a DSLR? Your smartphone can still deliver stunning bird photos, provided you work within its limits. Clip-on telephoto lenses (2x to 12x) attach to your phone’s camera and extend reach. They’re not cheap, but they’re far less expensive than a new camera system. The catch is stability — a phone at 10x zoom magnifies every hand tremor. Use a mini tripod or brace against a tree.
Hybrid setups work too: shoot with your phone through a spotting scope or binoculars. The ‘digiscoping’ technique involves holding your phone camera up to the eyepiece. It’s fiddly, but modern phone sensors handle it surprisingly well. Just keep the phone’s lens perfectly aligned and use the timer to avoid shake.
Camera Settings That Freeze the Moment
Okay, you have the gear. Now what? The exposure triangle — shutter speed, aperture, ISO — is your daily puzzle. Get it wrong and you’ll either freeze a blurry wing or blow out the sky. Here’s the exact recipe I use for most situations.
Shutter Speed, Aperture, and ISO Trio
For perched birds, a shutter speed of 1/500s is the floor. For flight shots, you need 1/2000s or faster — a hummingbird’s wings beat at 50 times per second, so 1/4000s is safer. Aperture-wise, shoot wide open (f/4 to f/5.6) to blur backgrounds and let in light. That creates that creamy bokeh everyone loves. But stop down to f/8 for group shots or when you need more depth of field.
ISO is your safety net. Modern cameras handle ISO 3200 without much noise, so don’t fear it. In overcast woods, I’ll happily push ISO to 6400 to keep shutter speed up. The noise you get is easier to fix in post than motion blur. Start with aperture priority (Av mode), set your aperture wide, and let the camera pick ISO. Then check your shutter speed — if it’s below 1/500s, raise ISO manually.
Mastering Autofocus Tracking Modes
Birds move. Your autofocus needs to keep up. Use continuous autofocus (AF-C on Nikon, AI Servo on Canon) and select a single focus point or a small cluster. Place that point over the bird’s eye — that’s where sharpness matters most. For flight photography, switch to a dynamic or 3D tracking mode that follows the bird across the frame.
Here’s a trick: pre-focus on a perch where you expect the bird to land. Then switch to manual focus and wait. When the bird arrives, you’re already sharp — just press the shutter. This works wonders for skittish species that won’t tolerate a moving lens. Practice at home with a moving toy to build muscle memory.
Field Craft: Finding and Approaching Birds
Settings are useless if you can’t get close. Field craft — reading behavior, using cover, and respecting distance — separates the lucky from the consistent. Most beginners walk straight at a bird. That’s the fastest way to watch it fly away. Instead, move slowly, stop often, and watch the bird’s body language.
Reading Bird Behavior and Habitats
Birds telegraph their next move. A relaxed bird preens, forages, or sings. A nervous bird freezes, cocks its head, or flicks its tail. When you see those signs, stop moving. Wait until the bird relaxes again before advancing. Learn each species’ habitat: warblers hug dense understory, raptors claim open fields, and waterbirds need shoreline. Find the food source — flowering trees, berry bushes, or insect-rich mud — and you’ll find the birds.
Seasonal behavior matters too. In spring, males sing from exposed perches to attract mates — perfect photo opportunities. In fall, juvenile birds are less wary. And during migration, birds are exhausted and focused on feeding, so they tolerate closer approaches. Use a bird hide or blind to get even closer without disturbing them.
Camouflage and Ethical Distance
Wear muted colors — greens, browns, grays. Avoid white, which stands out like a beacon. Move slowly, avoid sudden gestures, and never chase a bird. If it flies, you were too close. The rule of thumb: if the bird changes its behavior because of you, back off. A half-frame image of a relaxed bird is worth more than a full-frame shot of a stressed one.
Use natural cover — bushes, tree trunks, or a blind. Set up near feeding areas and let the birds come to you. Patience is the real skill. I’ve sat motionless for two hours for a single frame of a shy wren. It’s boring, but it works. And always respect nesting sites; getting too close can cause abandonment.
Composition: Beyond the Rule of Thirds
Sharpness gets you attention, but composition keeps it. The rule of thirds is a starting point, not a law. For birds, the eye is the anchor. Place the eye at one of the power points and let the bird’s body lead into the frame. Leave space in the direction the bird is looking — that negative space creates tension and story.
Backgrounds, Lighting, and Eye Contact
A cluttered background ruins a good shot. Look behind your subject before you press the shutter. Move your feet to find a clean patch of water, sky, or foliage. A wide aperture blurs the background, but it can’t fix a bright branch cutting through your subject’s head. Also, get down to the bird’s eye level. Shooting from above makes birds look small and insignificant. Crouch, lie on your stomach, or use a low-angle tripod.
Lighting makes or breaks feather detail. Golden hour — the first and last hour of daylight — gives warm, directional light that sculpts feathers. Overcast days are your friend too: they act as a giant softbox, reducing harsh shadows and bringing out subtle colors. Midday sun is brutal; you’ll get blown highlights and deep shadows. If you’re stuck in it, shoot in the shade or use fill flash (with a diffuser) to lift shadows.
Eye contact is non-negotiable. A bird looking at the camera engages the viewer. A bird looking away feels detached. Wait for the head turn, or use a squeaky call to get its attention. Some photographers use a mirror to reflect light into the bird’s eye — that catchlight adds life.
Capturing Action: Flight and Behavior
Still portraits are nice, but flight shots and behavior sequences tell a story. My best flight shots come from panning — tracking the bird with your lens as it moves. Set your shutter to 1/2000s or faster, use AI Servo focus, and start panning before the bird enters the frame. Keep your elbows tucked and pivot from your hips, not your arms. Take bursts of 5-10 frames; the keeper rate is low, but one sharp frame is worth it.
Behavior shots — hunting, feeding, courtship — require patience and a long lens. Watch a heron stalk fish; it’ll pause before striking. That pause is your cue to shoot. For a sequence, use continuous shooting (5-10 fps) and capture the whole arc. A series of three frames showing a kingfisher diving, hitting the water, and emerging with prey tells a richer story than any single portrait.
For more on flight specifics, check out this birds in flight guide that covers timing and panning in depth.
Post-Processing for Feather Detail
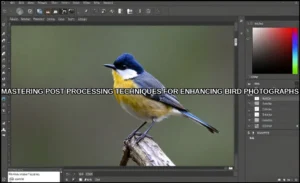
You got the shot, but it’s flat or noisy. Modern editing tools can rescue it. The goal is to enhance feather detail without making it look plastic. Start with a raw file — JPEG’s compressed data limits your recovery. In Lightroom or Capture One, adjust exposure and white balance first, then tackle noise.
AI Denoise and Sharpening Workflow
AI denoise tools, like Topaz Denoise AI or Lightroom’s AI Denoise, are game-changers. They analyze the image and remove noise while preserving feather texture. Run denoise before sharpening. Then apply selective sharpening to the bird’s eye and feather edges — not the background. Over-sharpening creates ugly halos; use a low amount (50-70%) with a small radius (0.5-1.0 px).
For feather detail, use a high-pass filter in Photoshop: duplicate the layer, apply a high-pass filter (radius 1-2 px), set blend mode to ‘Overlay’. This adds micro-contrast without blowing highlights. Work on a separate layer so you can mask out the background. And don’t overdo saturation — birds look unnatural with neon colors. Boost vibrance by 10-15%, not saturation.
Common Mistakes and How to Fix Them
Every photographer makes these mistakes at some point. Here’s how to avoid them or fix them on the spot.
- Soft focus on the eye. Always use a single focus point on the eye. If the bird moves, reacquire focus before shooting.
- Too slow shutter speed. For a perched bird, 1/500s minimum. For flight, 1/2000s. If your image is blurry, raise your ISO or open your aperture.
- Bad background. Move your feet to find a clean background. Or use a wider aperture to blur it more.
- Harsh midday light. Look for shade, or use a diffuser. Or convert to black and white — it handles contrast better.
- Over-editing. Halos, oversharpening, and neon colors scream ‘amateur’. Zoom to 100% and check feather edges.
Frequently Asked Questions
What is the best shutter speed for bird photography?
For perched birds, start at 1/500s. For flying birds, use 1/2000s or faster. Hummingbirds need 1/4000s to freeze wing motion. If you’re panning, you can drop to 1/1250s and still get sharp results.
How do I get sharp bird photos without a tripod?
Use image stabilization (if your lens has it) and brace yourself against a tree or wall. Tuck your elbows into your chest, exhale, and press the shutter gently. Also, use a higher shutter speed to reduce camera shake.
What is the best time of day to photograph birds?
Golden hour — the first and last hour of daylight — offers warm, soft light. But overcast days are also great because clouds diffuse light evenly. Midday sun creates harsh shadows, so avoid it unless you’re shooting in the shade.
How close can I get to a bird without stressing it?
It depends on the species and the situation. A good rule: if the bird changes its behavior (stops feeding, raises its head, flutters), you’re too close. Use a long lens and a blind to get closer without disturbing it. Always prioritize the bird’s welfare over the photo.
Can I use a smartphone for bird photography?
Yes, with limitations. Clip-on telephoto lenses extend your reach, and digiscoping through binoculars works. You’ll need good light and a steady hand. For serious bird photography, a dedicated camera with a telephoto lens is still better.
Putting It All Together
- Start with a telephoto lens — at least 300mm on a crop sensor. The Canon 75-300mm is a budget-friendly entry point.
- Use shutter speed 1/500s for perched birds, 1/2000s+ for flight. Adjust ISO first to keep that speed.
- Focus on the bird’s eye — always. Use continuous autofocus and a single point.
- Learn to read bird behavior. Approach slowly, use cover, and never chase.
- Compose with the eye at a power point, leaving space for the bird to look into.
- Shoot in raw and use AI denoise tools before sharpening for feather detail.
- Respect the bird’s space. A stressed bird is never worth the shot.
You now have the toolkit to turn frustrating misses into wall-worthy captures. Go practice — the birds are waiting.