Do you have chicken? Are they lay eggs and you wanted to hatch them? But you don’t know how to hatch chicken eggs using an incubator. If you are a beginner, you may be wondering what is the way to hatch your own chickens using an incubator. If so, then this article will help you out by giving you some tips on how to hatch chicken eggs with an incubator. In the previous article, we discussed about hatching process on peacock egg. You can also check it out.
Consider some factors before hatching a chicken egg
1. Incubator:

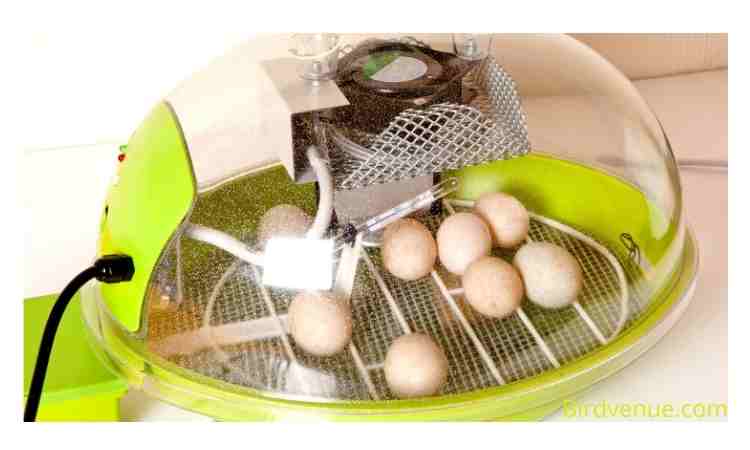
The first thing that you need to consider is the type of incubator that you want to use for hatching your eggs. There are different types of incubators available in the market today. You can choose from among those based on the size of the eggs that you want to hatch. The larger the egg, the bigger the incubator should be. However, if you are going to hatch small eggs like duck or quail eggs, then you can get away with smaller incubators. It all depends on the size of the egg that you want to hatch and the space that you have at home.
2. Temperature:
Another important factor that you need to take into consideration when choosing an incubator is the temperature that it has. This is because the temperature determines whether the egg will hatch or not. So, make sure that you buy one that has a suitable temperature range. Also, make sure that the temperature is adjustable.
3. Humidity:
Another important factor that you need to consider when buying an incubator is humidity. Make sure that the humidity level is high enough for the eggs that you want to be hatched
4. Select fertile egg:

If you are planning to hatch eggs, then you must select only fertile eggs. Fertile eggs are those that contain yolk sacs. These yolk sacs provide nutrients to the developing embryo inside the egg. If you hatch eggs without selecting fertile ones, then you might end up having chicks that do not survive. If you want to check whether the egg is fertile or not, then you can simply candle the egg. Candling means looking through the shell of the egg to see if there is any white substance like a blood vessel coming out of the egg. If yes, then the egg is fertile.
How to hatch chicken eggs with an incubator
Step 1: Set the incubator:
Before starting to hatch chicken eggs first you need to set the incubator. You need to run the incubator at least 24 hours prior to setting the eggs inside the incubator. During this period, the incubator will be set up so that the temperature and humidity levels are stable. You may need to adjust these settings if they aren’t right for your eggs.
Another important thing is location. Make sure that locate your incubator in a room that remains constant temperature where it won’t be disturbed by drafts or other sources of air, or sunlight movement.
Step 2: Set the correct temperature and humidity:
It takes 21 days to hatch a chicken egg. To ensure that the egg hatches within 21 days, you need to set the thermometer and hygrometer level accurately. A hygrometer is used to monitor the humidity level. You should maintain the following temperature and humidity which are recommended to hatch successfully chicken eggs:
Temperature: The eggs need to be kept at 99.5 degrees Fahrenheit at all times. If you’re not careful, just one degree higher or lower could end an embryo.
Humidity: You need to maintain humidity levels at 45% – 50% for the first 18 days. After you need to increase the humidity level to 60% – 65% before hatching the eggs.
It is not too hard to maintain the temperature and humidity level. Just follow the instructions given by the manufacturer and you’ll be able to hatch chicken eggs successfully.
Step 3: Prepare the eggs:
You need to prepare the eggs before putting them inside the incubator. Eggs must be allowed to sit for at least 24 hours before they’re used. Putting cold eggs into an incubator at room temperature and humidity will cause them to break and the embryos will die if they’re not kept cool enough. If you are unable to start the incubation period, you can hold the eggs for up to 7 days for best validity.
Step 4: Place the eggs in the incubator:
After preparing the eggs, you need to place them inside the incubator for the next 21 days. It’s very important to keep the eggs away from direct light because it will affect their development. Make sure that the eggs don’t touch each other as they will stick together. Also, make sure that you put the eggs in the correct position. Eggs should be placed on the bottom shelf of the incubator.
Step 5: Set the incubator for the next 1 – 17 days:
For the first 17 days, you need to turn the egg by hand 3 times a day. More frequent turning results in better hatch rates, but each time you open the incubators it loses heat and humidity, so be sure to turn them often. If you don’t turn the egg, the tiny embryo can stick inside the egg and it may die
During these first 17 days, you need to monitor the temperature and humidity carefully. If need water to maintain humidity, you must add water to the reservoir tank. For the first 7 days and 14 days, you can candle the egg to check its progress. If any embryo does not develop inside the egg, you can remove it.
Step 6: Lockdown from days 18 – 20:
In the final 3 days( 18 – 20) you will not open the incubator until the chick has hatched. This time we called it lockdown. During this period, you need to monitor temperature and humidity every 12 hours. Be sure to check the temperature and humidity levels every hour during the lockdown period. At this time you should stop turning the egg by hand and remove the eggs with an automatic turner. They’re almost fully grown and they’ll position themselves inside the eggs to prepare for hatching Increase the humidity to around 65–70% (or even lower if necessary). Humidity is a range and not a specific number. You should prepare the incubator for the hatching of the eggs by placing them inside.
Step 7: Hatch day:
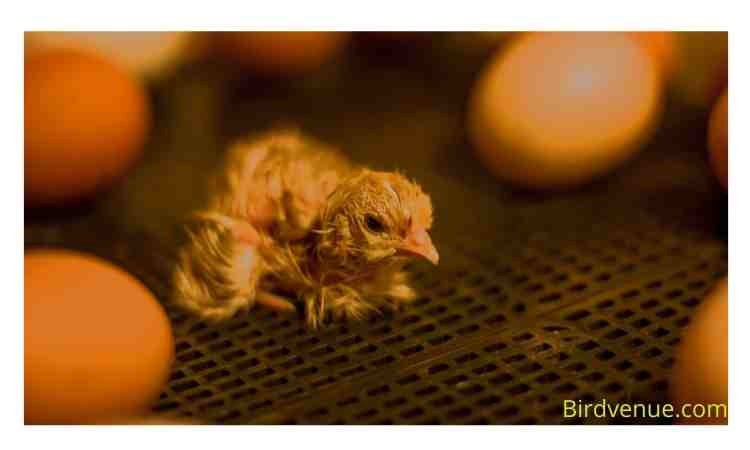
On the last day of the incubation process, you should leave the eggs alone for about 30 minutes. Then, you should gently tap the eggs to see if there is movement inside the shell. Once you hear the sound of cracking, you can take the eggs out of the incubator. The chicks should have hatched within 24 hours after being removed from the incubator.
Some chicks may be difficult to incubate, but do not help them. If you take action to help the chick, you may end up discovering that chick is ill or has some kind of disability. If you’re successful in helping the chick hatch, prepare yourself for a long-term relationship and possibly veterinary visits and round-the-clock care. The chick might also require special accommodations and needs to be kept separate from other chicks so it has space to grow without being stepped on by them. Before you decide to help the chick out, make sure that you’re ready to act if there is something wrong.
Step 8: Clean up:
After the chicks are born, clean the incubator thoroughly. Remove all debris and wash down the shelves with warm water. Use soap and hot water to clean the sides of the incubator. Wipe down the top of the incubator with a damp cloth. Dry everything well before storing your incubator. You can disinfect by using the bleach-water solution.
Step 9: Enjoy:
Once the chicks are born, you can enjoy watching their development. It’s fun to watch them move around and eat. Make sure to keep the incubator away from drafts and direct sunlight.
Precaution
- Keep the incubator away from sunlight.
- Make sure that the temperature remains constant every time. Otherwise, the embryo will die.
- The eggshell is very fragile. So, be careful during handling the egg.
- Never put the incubator near heat sources such as radiators, fireplaces, etc.
- Always read the instructions carefully before using the incubator.
What happens when I start my incubator?
When you start your incubator, the heating element turns on automatically. After the heating element heats up, the fan starts blowing air through the vents. When the temperature reaches the set point, the thermostat activates the heater. The heater warms the air in the incubator. The heated air rises and circulates throughout the incubator. The circulating air keeps the temperature at the desired level.
What to do before putting the egg in the incubator?
Before you put the egg into the incubator, allow cool eggs to warm slowly at room temperature. If eggs are left at room temperature for too long, they may become moist due to condensation caused by sudden warming from 55 degrees to 100 degrees Fahrenheit.
Can I open the incubator during hatching?
When hatching begins, and proper incubation conditions are maintained, the chick hatches naturally. However, if the incubator is opened prematurely, the chick could suffocate. Opening the incubator could cause the chick to lose its balance and fall off the shelf.
How often should I check the temperature during incubation?
Temperature is badly needed to hatch an egg. So you need to check the temperature frequently. If the temperature fluctuates, the embryo inside the egg will not develop properly. Therefore, you must monitor the temperature closely.
What will happen if I don’t turn the egg during incubation?
If you don’t turn the egg frequently the temperature will not spread evenly all over the egg body. This means that the temperature will be higher in one part than another. As a result, the embryo will not develop properly. Usually, you need to turn the egg three times a day.
Why does the temperature rise after turning the egg?
After turning the egg, the air inside the incubator becomes warmer. The warmed air spreads outwards. As a result, it takes longer to reach the cooler parts of the incubator. In other words, the temperature increases more quickly in warmer areas.
Final thought
Incubation of chicken egg is very interesting but you need to take care of it properly. You need to make sure that the temperature remains stable and consistent. Also, you need to pay attention to the humidity. In this article, we have discussed how to hatch chicken eggs in an incubator. Hope it will helpful for you and you can easily hatch your chicken egg by using an incubator at home.
