Hatching a duck egg without a commercial incubator is a deeply rewarding project. It connects you to a more natural cycle of life, whether you’re using a broody hen or a DIY setup. While it requires patience and attention to detail, the payoffa fluffy, peeping ducklingis unforgettable.
This guide walks you through every step, from choosing your method to caring for the new arrivals. We’ll cover natural incubation, homemade solutions, and how to troubleshoot common issues. For those who find the DIY route a bit daunting, many professionals recommend using the Incubator Automatic Egg for its consistent temperature and automatic turning, which can significantly boost your hatch rate. But let’s dive into the hands-on methods first.
Natural vs. Artificial Hatching: Choosing Your Path
Your first decision is between a natural mother and a homemade incubator. A broody hen is nature’s perfect incubator. She provides ideal hatching temperature and humidity, turns the eggs diligently, and can even teach ducklings basic behaviors. Breeds like Silkies or Cochins are famously broody. For ducks, Muscovy Ducks are exceptionally reliable setters, while Pekin Ducks rarely go broody.
If you don’t have a broody bird, a homemade incubator is your project. This typically involves a well-insulated box, a reliable heat source like a heat lamp or ceramic emitter, and precise tools to monitor conditions. The key challenge here is maintaining the strict environment the eggs need. Your local climate plays a huge role herea project in humid Florida faces different hurdles than one in arid Arizona.
The Role of Egg Fertility
No method works without a fertile egg. You can source eggs from a local farm, a reputable breeder, or even wild Mallard eggs where legally permitted. Remember, supermarket eggs are not fertile. Egg fertility is the starting block. Before you even begin incubation, it’s wise to learn the visual signs of a developing embryo, which we’ll explore through candling eggs later.
Setting Up Your Hatching Environment
Consistency is everything. Whether you’re using a broody duck hatching her own clutch or a DIY incubator setup, the parameters must be just right.
Temperature and Humidity: The Non-Negotiables
So, what temperature is needed to hatch duck eggs without an incubator? The magic number is 99.5F (37.5C), measured at the top of the egg. Fluctuations of more than a degree can harm the embryo. For humidity, aim for 55-60% for the first 25 days, then increase to 65-75% for the final “lockdown” period. This humidity for hatching prevents the membrane from drying out during the critical pip and zip phase.
You’ll need accurate tools. A digital thermometer/hygrometer combo is far superior to analog models. Brands like Farm Innovators make reliable models. For heat, a simple heat lamp can work, but it’s a common fire risk and can dry out eggs. Can you hatch a duck egg with a heat lamp? Yes, but with extreme caution. Always use a guard and keep flammable materials away.
Building a DIY Incubator
Your setup can be as simple as a sturdy cardboard box or a Styrofoam cooler. Key components include:
- Heat Source: A 40-watt bulb or a reptile ceramic heat emitter placed securely at one end to create a temperature gradient.
- Insulation: The box must hold heat well. Line it with foam board or reflective insulation.
- Humidity Source: A small dish of water with a sponge inside the box. Add more water or increase surface area to raise humidity.
- Egg Turner: If not hand-turning, a slow-moving motorized device can be rigged. Automatic turners, like those from Little Giant or Brinsca, are the gold standard for homemade incubator projects aiming for high success.
Place your incubator in a draft-free, temperature-stable room. Avoid direct sunlight or vents. For more detailed guidance, this authority guide from extension services is an excellent resource.
The Day-by-Day Hatching Process
Duck eggs take about 28 days to hatch, though Muscovy eggs need 35. This timeline is your roadmap.
Egg Turning and Candling
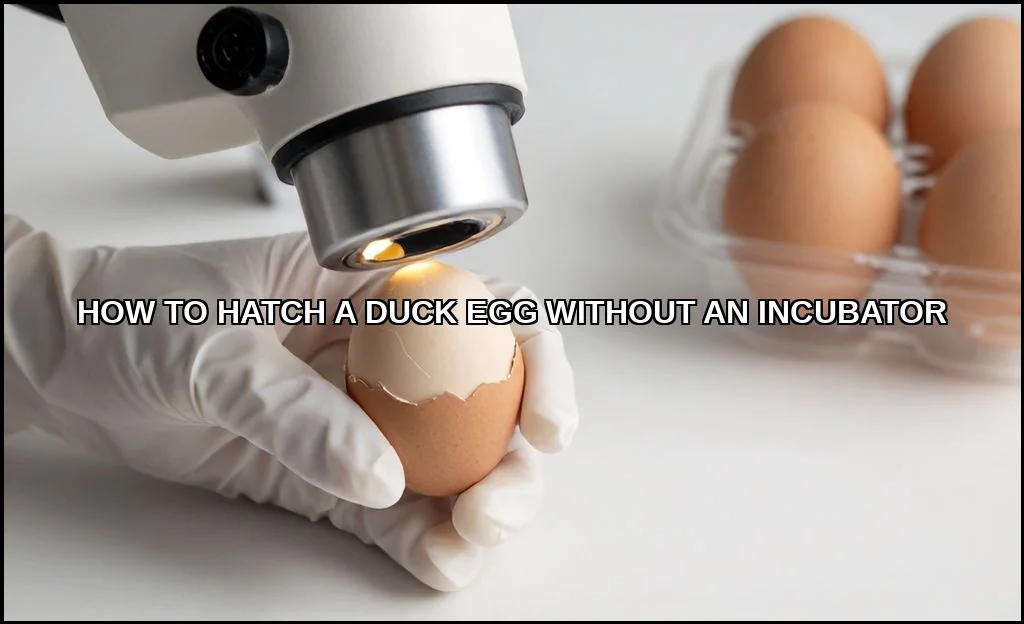
Eggs must be turned at least 3-5 times daily until day 25. This prevents the embryo from sticking to the shell. Mark an “X” and “O” on opposite sides to track turns. Every few days, use a bright LED light for candling. In a dark room, hold the light to the egg’s large end. Look for:
- Day 7-10: Visible spider-web-like veins and a dark spot (the embryo). A clear egg with a yolk shadow is infertile.
- Day 14-18: The embryo is larger, moving, and may block most of the light. The air cell at the blunt end should be growing.
Candling lets you remove infertile eggs or those where development has stopped, which is crucial for hygiene and your overall hatch rate.
The Final Countdown: Lockdown and Hatching
On day 25, stop turning the eggs. This is “lockdown.” Increase humidity to 65-75% and do not open the incubator or disturb the broody hen. The ducklings are positioning for hatching.
What are the signs a duck egg is about to hatch? You might hear faint peeping from inside the egg. The duckling uses its egg tooth (a small, temporary point on its beak) to pipmake a small hole in the shell for air. The zip is the long, circular crack they make to push out. This process can take 24-48 hours. Do not help them unless they are clearly stuck and bleeding after a full day. Intervention usually does more harm than good.
Understanding these duck egg development stages demystifies the wait. It’s a slow, incredible transformation.
Troubleshooting Common Problems
Even with perfect setup, issues arise. Heres how to diagnose them.
| Problem | Possible Cause | Solution |
|---|---|---|
| Low or No Hatch | Infertile eggs, chronic temperature swings, incorrect humidity. | Source eggs from a different flock, calibrate thermometers, stabilize environment. |
| Ducklings Pipped but Died | Humidity too low during lockdown, causing membrane to “shrink-wrap” the duckling. | Ensure humidity is high (75%) in final days. Add warm water to humidity tray. |
| Early Embryo Death | Extreme temperature spikes, infection, or genetic issues. | Maintain consistent heat, candle and remove rotten eggs promptly. |
| Broody Hen Abandons Nest | Disturbed too often, infested with mites, or simply not committed. | Provide a quiet, safe nesting box. Check for pests. Have a homemade incubator ready as backup. |
Remember, a 50-70% hatch rate without machine is considered good for DIY methods. Nature isn’t 100% efficient.
Caring for Newly Hatched Ducklings
Duckling care begins the moment they’re fluffy and dry. They don’t need food or water for the first 24-48 hours as they absorb the remaining yolk sac.
The Brooder Setup
Prepare a broodera safe, heated enclosure. A plastic storage tub or a large cardboard box works well. Key elements:
- Heat: Use a heat lamp or brooder plate (Brinsca makes excellent ones) to keep one area at 90F for the first week, reducing by 5F each week.
- Bedding: Pine shavings or old towels (no newspaperit’s too slippery).
- Food & Water: Use chick starter crumbles (non-medicated) and a shallow water dish they can’t drown in. Ducklings are messy!
If you used a broody hen, she will often care for them. For Khaki Campbell or Mallard ducklings, ensure they are protected from larger birds in a mixed flock. Their first few days are about warmth, hydration, and learning to eat.
Raising ducklings is a joy, much like discovering the perfect home for other birds. For instance, finding the best birdhouses can bring a different kind of wildlife wonder to your backyard. And if you’re fascinated by avian intelligence, you might enjoy learning about which parrots are the most vocal companions.
Your Hatching Journey Awaits
Hatching duck eggs connects you to a fundamental process. It teaches patience, observation, and respect for life’s delicate requirements. Whether you enlist a clucky surrogate or engineer a careful DIY system, success hinges on your ability to provide steady warmth, correct humidity, and a peaceful environment.
Start with fertile eggs from a breed that suits you, like the reliable Khaki Campbell. Monitor diligently, resist the urge to help too soon, and have your brooder ready. The peep of a new duckling is a sound of pure triumph. Its a hands-on project that yields not just ducklings, but a profound sense of accomplishment.
