How to Make a Miniature Birdcage: Step-by-Step DIY Guide
Contents
You’ve just finished arranging your dollhouse living room, and something looks off. The shelf above the fireplace has a stack of books and a tiny plant, but it feels flat. What it needs is a focal point, something with height and detail. A miniature birdcage solves that problem instantly. It adds a vertical element, a touch of vintage charm, and a story to the scene.
This guide walks you through the entire process of building one from scratch. You’ll learn about material selection, proper scale, wiring techniques, and finishing touches. I’ll also share the common mistakes that make miniatures look fake, so you can avoid them. By the end, you’ll have a sturdy, beautiful cage that looks like it came from a specialty shop, not a craft bin.

Mozff
Black Miniature Doll House Birdcage Ornament Model…
- MINIATURE BIRDCAGE: Delicate black birdcage ornament perfectly sized for dollhouse displays and fairy garden scenes
- VERSATILE DECOR: Ideal for desktop decoration, shelf displays, or as a charming accent piece in miniature garden settings
- DECORATIVE DESIGN: Features intricate detailing and classic birdcage styling that adds vintage charm to any mini display
If you want a quick, display-ready piece without the build time, the Mozff Black Miniature Birdcage Ornament is a solid shortcut. It comes pre-assembled with intricate detailing, so you can skip straight to arranging your scene. It works well for fairy gardens and desktop shelves where you want that classic silhouette immediately.
Choosing Your Materials and Scale
Before you cut a single wire, decide on the scale. Most dollhouses use 1:12 scale, meaning one inch equals one foot. A real birdcage is roughly 18 inches tall, so your miniature should be about 1.5 inches tall. For fairy gardens, scale is looser, but you should still keep proportions believable. A cage that looks like a telephone booth next to your fairy house will break the illusion.
For the frame, 20-gauge craft wire is the sweet spot. It bends easily with pliers but holds its shape without kinking. Thinner 24-gauge wire works for intricate scrollwork but feels flimsy for the main structure. Use 22-gauge for the vertical bars and 20-gauge for the top ring and base. This combination gives you rigidity where needed and flexibility for details.
Your base material matters more than you think. A wooden disc or a polymer clay base gives you weight, so the cage doesn’t tip over. A thin metal base looks elegant but makes the cage top-heavy. I prefer a 1/8-inch thick basswood circle, sanded smooth. It takes paint well and provides a flat surface for gluing the wire ends.
Tools You Actually Need
- Round-nose pliers for making loops and rings
- Flush cutters for clean wire ends (never use scissors)
- A small ruler with millimeter marks for measuring
- Epoxy glue or a strong craft adhesive for metal
- Acrylic paint and a fine brush for finishing
- A wooden dowel or pen cap to wrap wire around for perfect circles
You don’t need a jeweler’s bench. A steady table and good lighting work fine. The one tool I’d splurge on is a pair of flush cutters. Cheap ones leave a sharp, jagged edge that snags on everything. A clean cut makes the difference between a professional look and a craft-fail.
Building the Frame: Rings and Vertical Bars
Start with the top ring. Wrap your 20-gauge wire around a dowel that matches your desired diameter. For a 1:12 scale cage, a 3/4-inch diameter ring works well. Wrap the wire around the dowel twice, then twist the ends together tightly with pliers. Trim the excess and flatten the twist with a gentle tap from a hammer. This creates a seamless ring without a visible joint.
Cut six vertical bars from 22-gauge wire. Each bar should be about 1.5 times the height of your ring. For a cage that’s 2 inches tall, cut bars at 3 inches. This extra length gives you material to bend over the top ring and tuck under the base. Space the bars evenly around the ring. A simple trick: mark the ring at six equal points with a permanent marker before you start gluing.
Attach the bars to the top ring by wrapping the excess wire around the ring once, then pulling it tight with pliers. Work your way around the circle, keeping the bars perfectly vertical. Check your spacing with a ruler as you go. Uneven gaps are the most noticeable flaw in amateur miniatures. If a bar drifts, squeeze it back into position before the glue sets.
For the base ring, repeat the same process with a slightly larger diameter. A 1-inch base ring gives the cage a gentle taper, which looks more elegant than a straight cylinder. Slide the bottom ends of the vertical bars through the base ring, then bend them outward and flat against the base disc. This creates a sturdy anchor that won’t pop loose.
A Quick Note on Door Placement
Cut one vertical bar shorter than the others before assembly. This gap becomes your door opening. Make a small door frame from a single piece of wire, bent into a rectangle, and hinge it on one side with a tiny loop. You can leave the door open or closed. A tiny bird perched on the open door adds a story to the scene. If you want a more complex build, check out this birdcage door guide for variations.
Finishing Touches: Paint, Patina, and Details
Raw wire looks unfinished. Spray paint or hand-paint the entire cage with acrylics. Matte black is classic, but a distressed white or a verdigris copper patina looks stunning in a rustic setting. Apply two thin coats rather than one thick one. Thick paint fills in the gaps between wires and makes the cage look clunky.
To create a faux patina, paint the cage a dark green base, let it dry, then dry-brush a turquoise or teal over the top. Wipe off the excess with a paper towel while still wet. The dark base shows through the highlights, creating depth. This takes about ten minutes and looks like aged bronze.
Don’t forget the base. Sand the basswood disc, then paint it to match the cage or leave it natural. A clear gloss sealer protects the paint from chipping. For the top finial, glue a small bead or a twisted piece of wire to the top ring. A tiny pearl bead adds a Victorian touch, while a simple wire curl looks more modern.
One detail people often skip: the seed catcher tray. It’s the shallow dish that sits under the cage. You can make one from a polymer clay circle or a bottle cap. It adds realism and gives the cage a finished silhouette. Plus, it hides the messy wire ends on the underside of your base.
Comparing Build Methods: Wire, Wood, and Clay
| Method | Best For | Difficulty | Time Needed | Durability |
|---|---|---|---|---|
| Wire Frame | Classic detailed cages, open designs | Medium | 1-2 hours | High, holds shape well |
| Wooden Dowels | Sturdy, rustic cages for fairy gardens | Easy | 45 minutes | Very high, but bulky |
| Polymer Clay | Solid, sculpted cages with ornate details | Hard | 2-3 hours plus baking | Medium, can chip if dropped |
| Paper or Cardboard | Quick prototypes or temporary props | Very Easy | 15 minutes | Low, not for handling |
Wire is the best all-around choice for most projects. It allows airy, realistic bars and you can bend it into any shape. Wooden dowels are forgiving for beginners, but they look chunky unless you taper them carefully. Polymer clay lets you sculpt intricate details like filigree, but it’s heavy and requires a kiln or oven. Cardboard is fine for testing scale, but it won’t survive a curious child or a clumsy shelf bump.
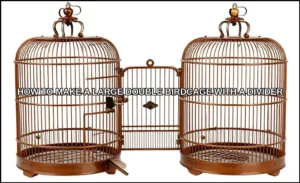
For a more advanced project, consider building a larger version with a functional divider. That’s a different beast entirely, but the same wiring principles apply. You can find a detailed walkthrough on double birdcage construction if you want to scale up.
Common Mistakes and How to Fix Them
The biggest mistake is using wire that’s too thin. 24-gauge wire looks great in photos but bends out of shape the moment you touch it. You end up with a wobbly cage that leans to one side. Stick with 20-gauge for the main structure. It’s stiff enough to hold its shape but still easy to work with.
Another issue is uneven bar spacing. If you eyeball it, the gaps will be inconsistent. Measure twice, glue once. Use a small piece of tape with marks on it to guide your placement. It takes an extra minute, but it makes the finished piece look professional.
Finally, don’t rush the glue drying. Epoxy takes about 24 hours to fully cure. If you handle the cage too early, the joints will shift and you’ll be stuck with a crooked frame. Let it dry overnight. Work on another project in the meantime, or just walk away.
Frequently Asked Questions
What is the best wire gauge for a miniature birdcage?
Use 20-gauge wire for the main rings and base, and 22-gauge for the vertical bars. This combination gives you a rigid structure that won’t bend under its own weight. Thinner wire is only suitable for decorative scrollwork on the outside.
How do I make perfectly round rings without a special tool?
Wrap the wire around a cylindrical object like a dowel, pen cap, or pill bottle. The diameter of the object determines the ring size. For a 1:12 scale cage, a 3/4-inch dowel creates a proportional top ring. Wrap the wire tightly, twist the ends, and trim the excess.
Can I use hot glue instead of epoxy?
Hot glue works for a quick prototype, but it’s not ideal for permanence. It softens in warm conditions and can leave visible strings. Epoxy or a strong craft adhesive designed for metal gives a cleaner, stronger bond. The extra drying time is worth the stability.
How do I paint the cage without getting paint on the glass or base?
Paint the cage before you attach it to the base. Hold the wire frame with a pair of tweezers or a clip, then spray paint or brush on the acrylic. For the base, paint it separately. This prevents drips and ensures even coverage on all sides of the wire.
What can I use for the tiny bird inside?
Polymer clay is the easiest option. Roll a small teardrop shape for the body, add a tiny ball for the head, and press in a small seed bead for the eye. Bake it according to the clay instructions, then paint it. A simpler option is to buy a pack of miniature resin birds from a craft store.
Final Tips for a Professional Look
- Always use flush cutters and file down any sharp wire ends with a nail file.
- Prime the wire with a metal primer before painting to prevent chipping.
- Add a small chain from the top ring to the finial for a hanging option.
- Use a magnifying lamp if you have one; your eyes will thank you after an hour of detailed work.
- Keep a small dish of rubbing alcohol nearby to clean your pliers when they get sticky.
- Test the scale by placing the finished cage next to a 1:12 scale chair or table before you finalize the base.
- If you want a quick, reliable option, the pre-made Mozff birdcage skips the build entirely and looks great on a shelf.
Building a miniature birdcage is a satisfying afternoon project. The skills you learn here—wiring, scaling, and finishing—transfer directly to other miniature builds like lamps, trellises, or even a corner platform for a larger aviary. Take your time with the measurements, and don’t be afraid to scrap a ring and start over. The second attempt always looks better than the first.