
How to Hatch Peacock Eggs Without an Incubator
By Erick Updated 8 min read
As an Amazon Associate I earn from qualifying purchases. That costs you nothing and does not decide what gets recommended. We also earn a commission from some links to partner brands (POPOSOAP, Kiwibit Inc.).
On this page (6 sections)
You find a clutch of peacock eggs, or maybe your hen went broody on a mixed nest. But you don’t own an incubator. The thought of letting those eggs go to waste stings. Hatching them without artificial heat is possible, but the margin for error is slim. This article walks through the methods that actually work, the critical numbers you must hit, and the traps that kill embryos.
You will learn the two main paths: using a broody hen (the safest) or managing temperature and humidity manually with household items. I cover specific temperature targets, humidity ranges, turning schedules, and how to candle eggs to check fertility. No fluffy advice — just the conditions that get chicks to pip.
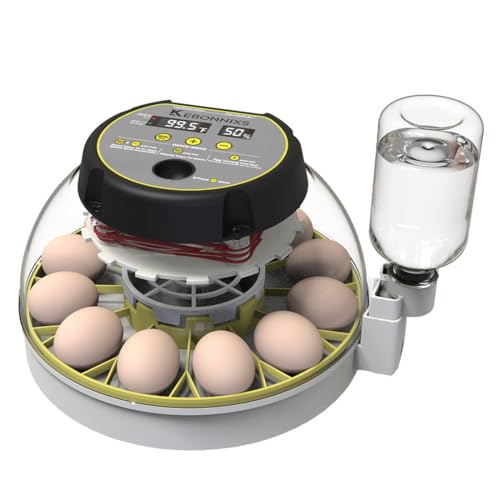
KEBONNIXS
KEBONNIXS 12 Egg Incubator with Humidity Display,…
- ★【STABLE TEMPERATURE】- Induced airflow system drived by a strong circulating fan for a stable incubator temperature distribution
- ★【DISPLAY HUMIDITY LEVEL】- No need to buy additional hygrometer to monitor incubator humidity level
- ★【BUILT-IN EGG CANDLER】- No need to buy additional egg candler to observe the development of eggs
If you decide an incubator makes more sense for repeat hatches, the KEBONNIXS 12 Egg Incubator with built-in humidity display and automatic egg turner removes most of the manual guesswork. But for a one-time clutch or a power outage backup, the methods below work.
The Two Reliable Routes: Broody Hen vs. Manual Care
A broody hen is your best bet. She provides steady heat, instinctive turning, and the right humidity from her skin and breath. A Silkie, Cochin, or Orpington hen that has gone fully broody (sits tight, puffs up, growls when approached) will incubate peacock eggs without any help from you. Her body temperature runs about 101-102°F, which warms the eggs to the needed 99.5°F through contact. She turns the eggs several times an hour and keeps them at 50-55% humidity naturally.
But broody hens are not always available. If you have no broody hen, you must replicate those conditions yourself. Manual care means a heated container, a thermometer you trust, and a strict schedule. You can use a DIY incubator built from a Styrofoam cooler, a light bulb, and a dimmer switch. Or you can use a heating pad with towels — riskier but possible for small clutches.
Whichever method you choose, the two non-negotiable factors are temperature stability and humidity control. Peacock eggs are larger than chicken eggs and take 28 days to hatch. Slight swings kill the embryo. I have seen people crack eggs open on day 25 only to find a fully formed chick that died from a dry air cell or a temperature spike on day 10.
Temperature and Humidity: The Make-or-Break Numbers
Peacock eggs need a steady 99.5°F (37.5°C) measured at the center of the egg, not on the heat source. If you are using a broody hen, she does this automatically. If you are building a manual setup, here are the specific targets:
- Temperature: 99.0–100.0°F for the full 28 days. Do not let it drop below 98°F or rise above 101°F for more than 30 minutes.
- Humidity (days 1–25): 50–55%. At lower humidity, the air cell grows too large and the chick dries out. At higher humidity, the air cell stays too small and the chick drowns in the shell.
- Humidity (days 26–28): Raise to 65–70%. This softens the shell membranes so the chick can pip. Keep the increased humidity until hatch completes.
To measure temperature, use a digital thermometer with a probe placed near the eggs, not touching the bulb or the container wall. Humidity is trickier without a hygrometer. A simple method: fill a shallow dish with water and place it inside the container. The surface area of the water determines humidity. For 50-55%, use a dish about 4 inches in diameter for a 12-egg setup. For 65-70%, add a second dish or a damp sponge. Check the condensation on the container walls — mist inside is good, dripping water means too wet.
Manual turning is required. Turn the eggs an odd number of times daily (3 to 5 times) so the embryo does not stick to one side. Mark one side with an X and the other with an O to track each turn. Stop turning on day 25 — the chick positions itself to pip.
Building a Simple DIY Incubator (or Surrogate Methods)
The most reliable manual option is a Styrofoam cooler incubator. Here is what works:
- Container: A 12-quart or larger Styrofoam cooler. Drill two small holes at the top for air exchange.
- Heat source: A 25-watt incandescent bulb. Screw it into a ceramic socket mounted through the lid. A 40-watt bulb is too hot unless you use a dimmer. A 15-watt bulb may not reach temperature in a cooler room.
- Temperature control: A dimmer switch (like a lamp dimmer) lets you dial in the exact heat. Alternatively, use a reptile thermostat from a pet store. Without a dimmer, you will constantly add or remove ventilation.
- Humidity: A shallow plastic container full of water placed under the bulb. Monitor condensation; adjust water surface area as needed.
- Egg holder: A plastic egg carton turned upside down with holes cut for each egg, or a piece of hardware cloth with spaces. Elevate the eggs above the water bath so they do not sit wet.
Set up the incubator and run it for 24 hours before adding eggs. Check temperature at the egg level — adjust the dimmer until it stays at 99.5°F. Room temperature affects stability; keep the cooler in a room that does not swing more than 5°F in a day.
Another method uses a heating pad on the lowest setting. Place the pad inside a cardboard box, cover it with a folded towel, and set the eggs on the towel. A damp cloth placed next to the eggs provides humidity. This method is less stable because heating pads cycle on and off unpredictably. Use it only in emergencies, and check temperature every 2 hours. A heating pad that reaches 105°F will cook the eggs.
For either method, candling eggs around day 10 tells you if the embryo is alive. A quick comparison of methods is in the table below.
| Method | Temperature Control | Humidity Control | Turning Required | Effort Level | Best For |
|---|---|---|---|---|---|
| Broody Hen | Automatic (101-102°F brood patch) | Automatic (from hen’s body and breath) | None (hen does it) | Very low | Anyone with a broody hen; highest success rate |
| DIY Styrofoam Cooler Incubator | Manual with dimmer (99.5°F target) | Manual (water dish, measure condensation) | 3-5 times/day, stop day 25 | Moderate | 2-12 eggs, steady room temperature |
| Heating Pad & Towel Box | Poor; pad cycles on/off, risk of overheating | Poor; difficult to maintain consistent humidity | 3-5 times/day, stop day 25 | High vigilance needed | Emergency or 1-2 eggs only |
Candling and Determining Fertility (Without an Incubator)
Candling reveals which eggs are developing and which are dead or infertile. You do not need a special egg candler — a bright LED flashlight in a dark room works fine. Hold the flashlight against the large end of the egg (where the air cell is).
At day 7 to 10 of incubation, look for:
- Veins: A spider web of red blood vessels. The embryo itself may look like a dark spot moving when you rotate the egg.
- Clear egg with no veins: Likely infertile. Discard after day 12 — rotten eggs can explode.
- Dark ring or blood ring: Embryo died early. Remove immediately; it contaminates other eggs.
- Vigorous movement: Healthy. The chick will shift as you candle.
Candle again at day 24. By then the egg should be mostly dark except for the air cell at the blunt end. If the air cell looks too large (more than one-third of the egg), humidity was too low. Too small, humidity was too high. Both kill the chick before hatch.
Discarding dead eggs is critical. A rotten egg produces methane and bacteria that infect healthy embryos. If you smell a foul odor from the incubator, find that egg immediately.
Frequently Asked Questions
How long does it take for peacock eggs to hatch?
Peacock eggs hatch in exactly 28 days from the start of incubation. They can pip up to 24 hours early or late if temperature varied. Do not give up on an egg until day 30 — occasionally a healthy chick is just slow. If no pip by day 30, the embryo likely died.
What temperature do peacock eggs need?
99.5°F (37.5°C) is the target temperature at the egg surface. The incubator or hen must hold this within a 1.0°F band (98.5-100.5°F). Below 98°F for more than a few hours and the embryo stops developing. Above 101°F for even an hour can cause fatal deformities, especially in the heart and beak.
Can I use a regular heat lamp?
Not directly. A typical 250-watt heat lamp throws intense radiant heat that cooks eggs in minutes if placed too close. You can use it if you rig a dimmer and position the lamp at least 18 inches above the eggs, with a thermometer to verify temperature. The risk is high — I have seen people fry entire clutches. A 25-watt bulb is safer.
How often do I need to turn peacock eggs?
Turn them 3 to 5 times daily at even intervals. For example, at 6 AM, 10 AM, 2 PM, 6 PM, and 10 PM. Always turn an odd number of times so the egg does not spend two nights on the same side. Stop turning on day 25. The chick positions its head toward the air cell and needs to stay that way to pip correctly.
What humidity level is needed for peacock eggs?
50-55% relative humidity from day 1 through day 25. Raise to 65-70% starting day 26 until hatch completes. Without a hygrometer, test by feel: eggs that lose moisture too fast will feel light and have a large air cell. Eggs that lose too little will feel heavy and the air cell will be small. Weigh a few eggs on day 1 and again on day 14 — they should lose about 13-15% of their weight. If they lost less, increase ventilation; if more, increase humidity.
What You Need to Remember
Hatching peacock eggs without an incubator is possible, but you must be honest about the effort it takes. Here are the key actions to take:
- Use a broody hen if available — she does the hard part for you. Silkie hens make ideal surrogate mothers for peacock eggs.
- If going manual, build a Styrofoam cooler incubator with a 25-watt bulb and dimmer. Test the setup for 24 hours before adding eggs.
- Maintain temperature at 99.5°F with a reliable digital thermometer. Check twice a day.
- Keep humidity at 50-55% for the first 25 days, then raise to 65-70% for the last 3 days. A water pan with adjustable surface area works.
- Turn eggs 3-5 times daily, marking each egg with X and O. Stop turning on day 25.
- Candle at day 10 and day 24. Remove any infertile or dead eggs immediately to prevent bacterial spread.
- For general tips on keeping bird eggs alive before incubation starts, read that guide.
